欢迎光临~深圳市伟钰科技有限公司
语言选择:
 ∷
∷

∷
 ∷
∷
应用:
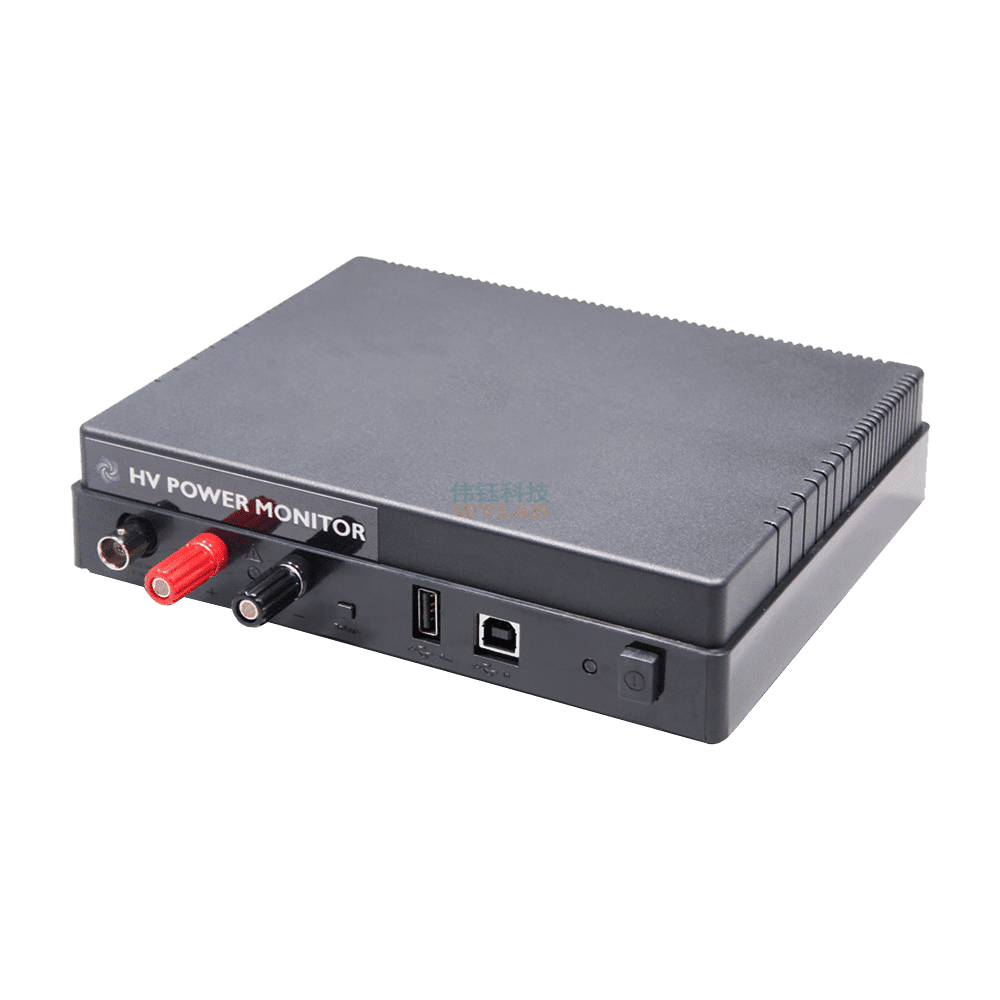
AAA10F是一个兼备电源和测量电流功能的设备。它的目的是作为一个电池或电源更换为您的设备,让它记录设备运行期间所有的功率消耗
保修:非人为原因,所有产品保修一年。
技术支持:我们对仪器提供终身免费技术支持,您遇到任何问题,我们都会在当天反馈的美国 原厂,当天即可得到技术支持。我们一定给您最准确最权威的答复。
应用范围:购买此仪器的客户80%是测手机的电流,功耗及其稳定性。此仪器还可以测电子元器 件上的功耗,电流电压测试范围是可以调节的,此仪器精度很高,测试精度可以达到微安级别,可以满足绝大部分的电流功耗测试。
关于客户范围:我们的客户主要覆盖各大手机公司,包括联想手机,TCL手机,华为手机,中兴手机,360手机等。 还覆盖各个大学,研究所,包括清华大学,郑州大学等。还覆盖各大手机方案公司等。
特点:
详细产品参数:
The PowerTool software and the Power Monitor hardware provide a robust power measurement solution for mobile devices. The PowerTool so ftware and the Power Monitor Hardware can analyze the power On any device that uses up to a 3-cell Lithium-Ion Battery, supplying up to 13.5V and 6 Amps. Electrical engineers and software developers can utilize the PowerTool software and the Power Monitor hardware to optimize the design and analyze the performance of their mobile devices.
Figure 1 Graphical user interface (GUI) for the PowerTool
software
The Power Monitor can measure data on three channels: Main, USB, and Auxiliary. The Main channel is what most users will use for their measurements. A USB channel is provided as is an AUX channel . The GUI details are described below for the Main channel, but largely apply to all sampling sources. Cases where they differ are called out in the appropriate sections on USB or AUX measurements.
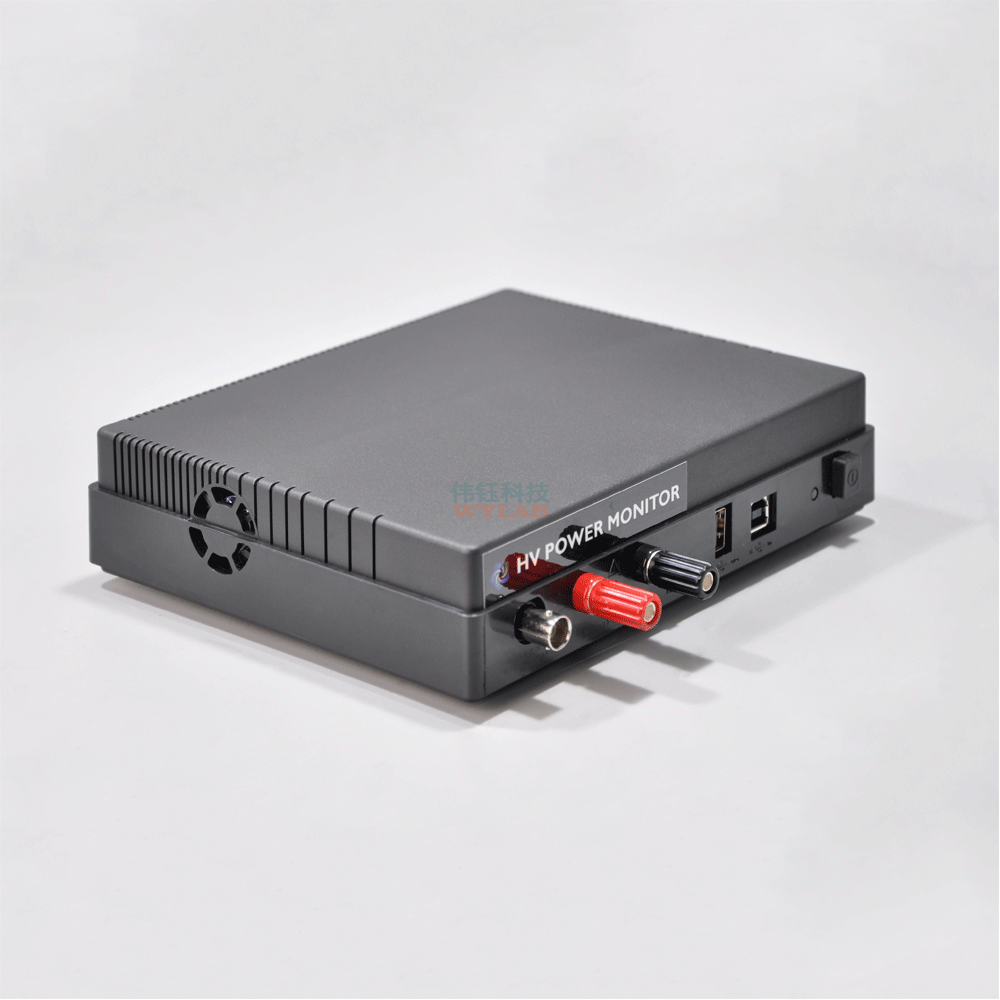
Figure 2 Mobile Device Power Monitor
A dedicated Windows plat Form workstation is required to be used with the Power Monitor to achieve the optimal performance and results. Slower/older computers may not be able to process samples efficiently enough and users may see a significant number of dropped samples.
ξ Windows Vista, Windows 7, Windows 8, or Windows 10 [XP support discontinued after 4.0.4.11]
ξ 1024x768 or greater screen resolution
ξ 3.2 GHz 32-bit (x86) processor.
ξ 4 GB of system memory
ξ 40 GB hard drive with at least 15 GB of available space
ξ Version 4.0.4.12 and 5.0.0.0 require .Net 4.5. Version 4.0.4.11 requires .Net 4.0. Versions 4.0.4.0-4.0.4.10 require .Net 3.5.
ξ Full Speed USB 2.0 ?integrated chipset or PCI/PCI Express add in card.
ξ USB 3.0 or Downstream Charging ports are recommended for Front-panel connections.
USB Hubs, including monitor hubs, should not be used with the Power Monitor for optimal performance.
Prior to installing the latest version, uninstall any previous version of the Power Monitor Software from the Control Panel.
Create a new temporary folder on the development workstation under the root directory
(C:).
Copy PowerTool.zip to the Development workstation.
Extract the contents of PowerTool 5.X.X.X.zip to the temporary folder.
Run PowerTool Install.exe
Follow the on screen prompts to install the PowerTool Software.
After the PowerTool application has been installed and this is the first time the workstation
will be running the PowerTool application you will need to install two drivers, the Power
Monitor driver and the Firmware driver. Instructions are as follows:
1.Power on Power Monitor in normal mode ?Green led should be on.
2.Under Device Manager, find Mobile Device Power Monitor ?will have a yellow exclamation mark.
3.Right click and select Update Driver Software?
4.Select Browse my computer for driver software
5.Browse to C:Program Files (x86)Monsoon Solutions IncPowerMonitorDriversPC and click on Next.
6.Click on Close once the driver has finished installing.
7.Under Device Manager ?Universal Serial Bus devices, ensure that the Mobile Device Power Monitor has enumerated properly.
1. Power on the Power Monitor in Output Enable mode by depressing the Output Enable button and the Power button simultaneously ?Amber led should be on.
2.Under Device Manager find the Unknown device and right click, select Update Driver Software?
3. Select Browse my computer for driver software
4. Browse to C:Program Files (x86)Monsoon Solutions IncPowerMonitorDriversFirmware and click on Next
5. Click on Close once the drive has finished installing.
6. Under Device Manager ?Custom USB Devices verify that the Microchip Custom USB Device has enumerated properly.
The Power Monitor is shipped with the latest firmware and in most cases will not be required to be updated. If for any reason the firmware does need to be updated use the following instructions.
Power on the Power Monitor in Output/Enable mode by pressing on the Output Enable button and Power button simultaneously. The amber light should be on.
Figure 3 Output Enable button
Start the PowerTool application, and select the Reflash option, which is enabled whenever a Power Monitor device in boot mode is detected.
Figure 4 PM Flash Select Option
Click on the Load button and browse to the PMFlash folder where the PowerTool application
was installed and select the PM_RevX_ProtXXVerXX_Boot.fwm file. (Note, X is a placeholder for the proper version information for a given fwm file, for example,PM_RevD_Prot18_Ver21.fwm). The Reflash utility is also compatible with the deprecated .hex file format used in previous firmware releases.
Click on the Write button
Wait until the Status shows ?Write complete?.
Click on the X in the upper right of the window to exit when you are done.
Power off and then power back on the Power Monitor so you now have a green light.

Figure 5 PM Flash Window
1.Ensure to read all instructions carefully before operation. Using the Power Monitor in A manner not specified by this manual may damage the equipment and impair protections designed for user safety.
2.Be sure that the power switch on the front of the Power Monitor hardware is not engaged. The hardware should not be powered-up.
3.The power switch should be in the outward position, not the inward position.
4.Connect the supplied 16 VDC / 7.5 Amp, power supply to the back of the Power Monitor and a wall power supply matching the unit抯 input requirements (100-240V, 47-63 Hz, 1.6A Maximum)
5.The power supply should be positioned so that it is within easy reach in the event that it needs to be disconnected for safety. Ensure this by placing the power brick on the same work surface as the Power Monitor with the AC input side facing the user. Ensure there are no obstructions in the work area that may impede you in the event of an emergency.
6.On a development workstation that is compliant with Full-Speed USB 2.0, connect a USB cable to the USB connector on the back of the Power Monitor hardware, and connect the other end of the USB cable to the development workstation. Do not connect to an external USB hub device.
************************************************************
Do not connect a third party power supply to the Power Monitor. The connector used does not have a standard pinout, and an improperly selected Power Supply may damage the device. If a replacement power supply is Required, contact Monsoon Solutions.
************************************************************
Figure 6 Back view: Power connector and USB connector
7.Turn on the Power Monitor hardware by engaging the power button on the front. The internal fan will briefly power-up and then power-down.
8.Initially, the power light-emitting diode (LED) is amber, and then it turns green. The green LED is connected directly to the internal power of the Power Monitor.
Figure 7 Front view: Engaged power button and powered-up green LED
Refer to the Appendix on how to properly configure a device battery to connect to the Power Monitor.
Note Wear ANSI Z87.1 compliant safety goggles at all times while working with exposed battery terminals and wiring.
**************************************************************
Connecting the Power Monitor to a device to collect current measurements can be complicated and dangerous. Be sure that the area where power measurements are being conducted is protected from fire danger, do not have flammable items
nearby. These measurements are at your own risk, and these procedures are not guaranteed to prevent damage or injury.
**************************************************************
Note When attaching the power measuremenT hardware to a device with a lithium battery, there is always a risk of damaging the device, or causing the device to heat-up, Generate smoke, or catch fire. While this is unlikely, be extremely careful. It is recommended to work on a flame-resistant surface and have fire control equipment at the ready when performing the battery bypass and connecting the Power Monitor to the device under test. Immediately disconnect equipment that begins to exceed safe temperatures
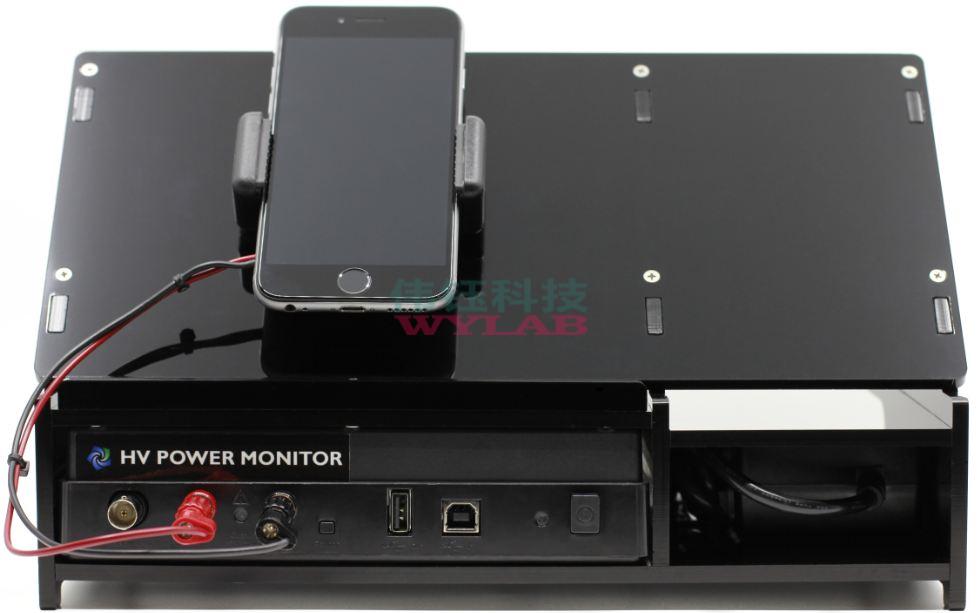
Figure 8 A mobile device connected to the main channel
After connecting the device, power up the Power Monitor and run the PowerTool software (PowerTool.exe). The software should connect to the Power Monitor, and display the user interface (UI).
Figure 9 PowerTool software UI afTer connecting to a device
The revisions of the hardware (HW ver), firmware (FW ver), and software (SW ver) should be compatible for consistent and repeatable results and performance.
If the Power Monitor software Is updated, the firmware will need to be confirmed for compatibility. The Power Monitor will prompt the user to indicate that a new firmware is required to run this revision of software. If this occurs, then the firmware (FW ver) will need to be updated on the Power Monitor. Please follow the instructions on updating the Power Monitor firmware.
The following table describes The various revision numbers that are displayed in the UI.
| Field | Description |
| HW rev | Power Monitor hardware revision |
| FW ver | Power Monitor firmware version |
| Prot ver | Version of protocol specification |
| SW ver | PowerTool UI version |
| HW rev | SW ver | Firmware Version |
| B, C, D | 3.0.4 | 12 |
| B, C, D | 4.0.2, 4.0.1 | 17, 18 |
| B, C, D | 4.0.3 | 19 |
| B, C, D | 4.0.4 | 19, 20 |
| D, F | 5.0.0 | 21 |
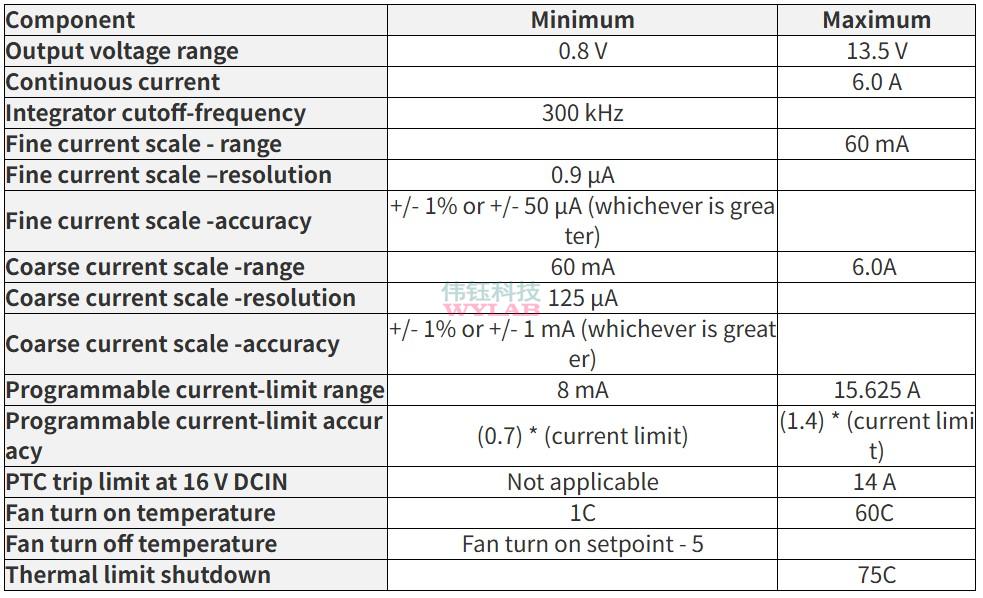
AAA10F Specification Parameter
| Component | Minimum | Maximum |
|---|---|---|
| Output voltage range | 0.8V | 13.5V |
| Continuous current | 6.0A | |
| Integrator cutoff frequency | 300 kHz | |
| Fine current scale-range | 60mA | |
| Fine current scale-resolution | 2.86uA | |
| Fine current scale-accuracy | +/-1% or +/-50uA(whichever is greater) | |
| Coarse current scale-range | 60mA | 6.0A |
| Coarse current scale-resolution | 286uA | |
| Coarse current scale-accuracy | +/-1% or +/-1mA(whichever is greater) | |
| Programmable current limit range | 8mA | 15.625A |
| Programmable current limit accuracy | (0.7)*(current limit) | (1.4)*(current limit) |
| PTC trip limit at 16V DCIN | Not applicable | 14A |
| Fan turn on temperature | 1C | 40C |
| Fan turn off temperature | Fan turn on setpoint-5 | |
| Thermal limit shutdown | 75C |
To make sure the correct software is installed,check the revision fields in the UI. Figure 10 below shows the area of the UI that displays the software revision.
Figure 10 Revision fields shown in the PowerTool UI
最大输出电压: 13.5V
最大持续电流: 6A
最大辅助输入电压: 5.5V
高压电源监视器是完全UL,FCC和CE认证。它适用于需要一到三个锂离子电池供电的设备。
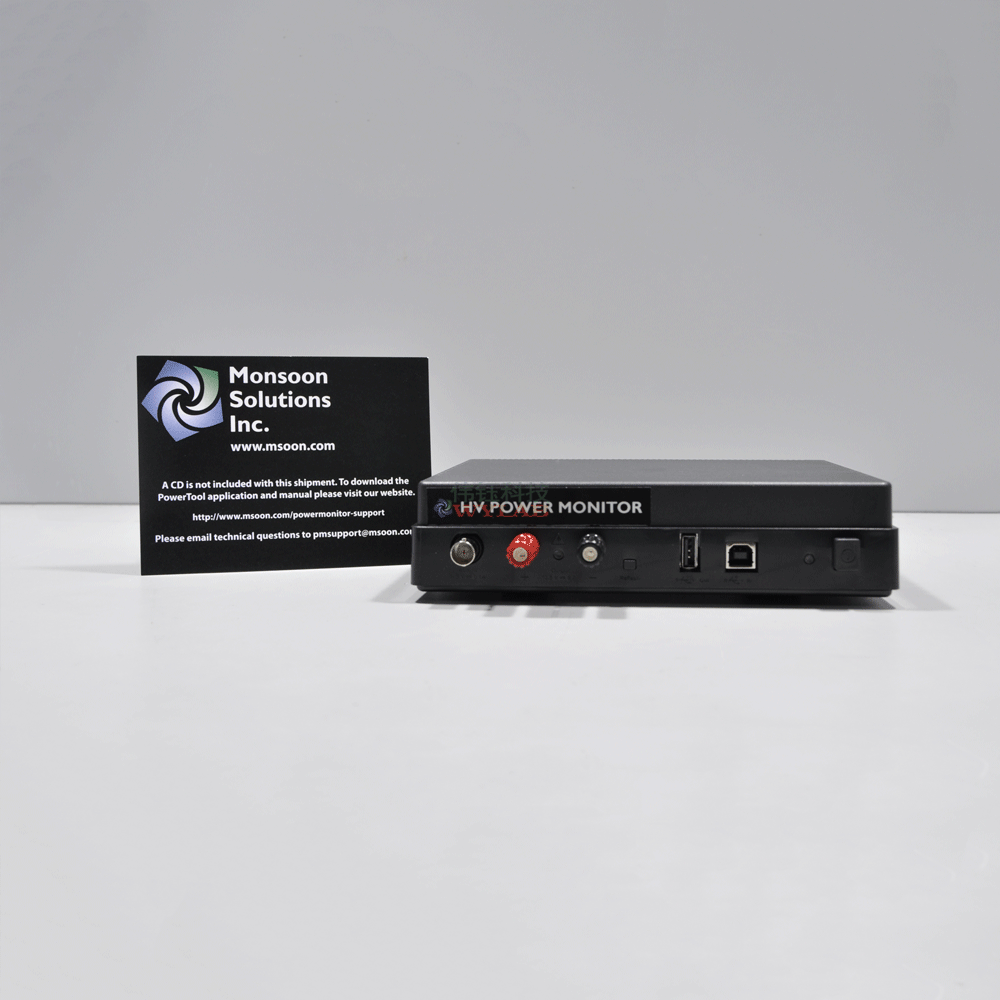
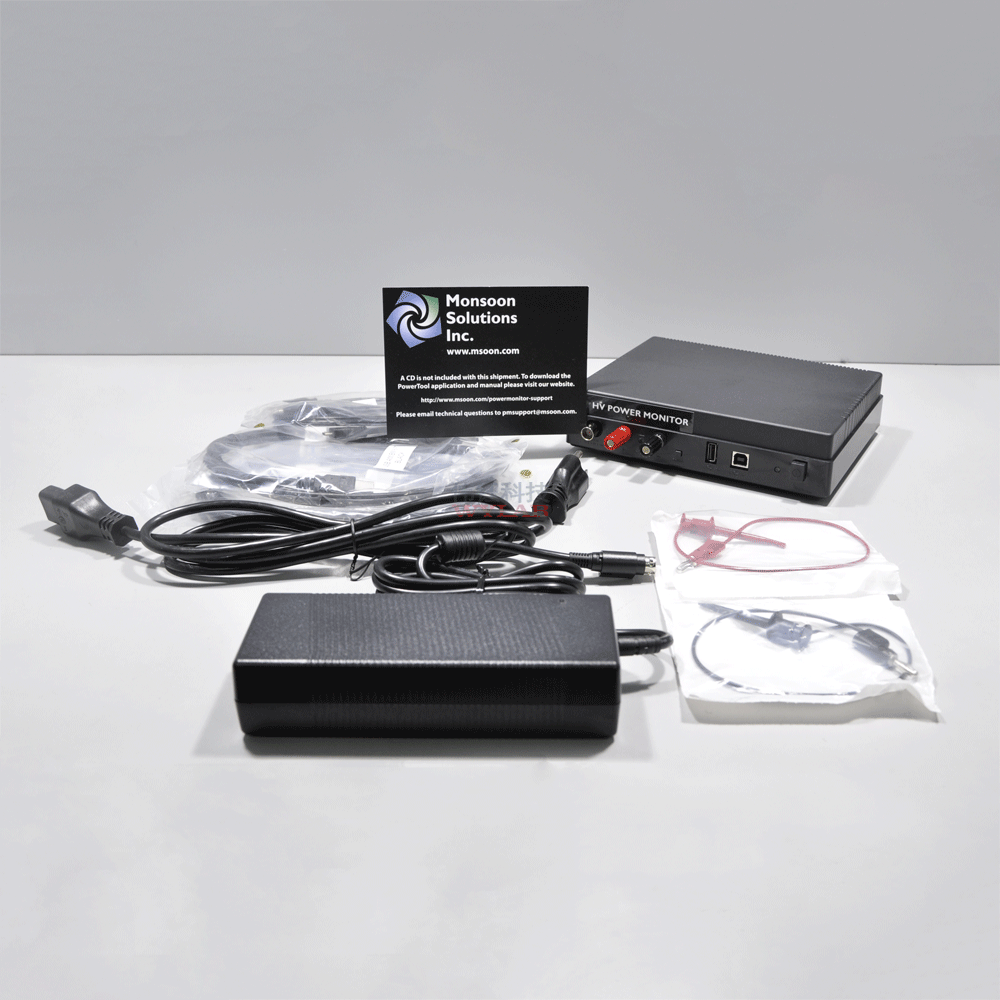
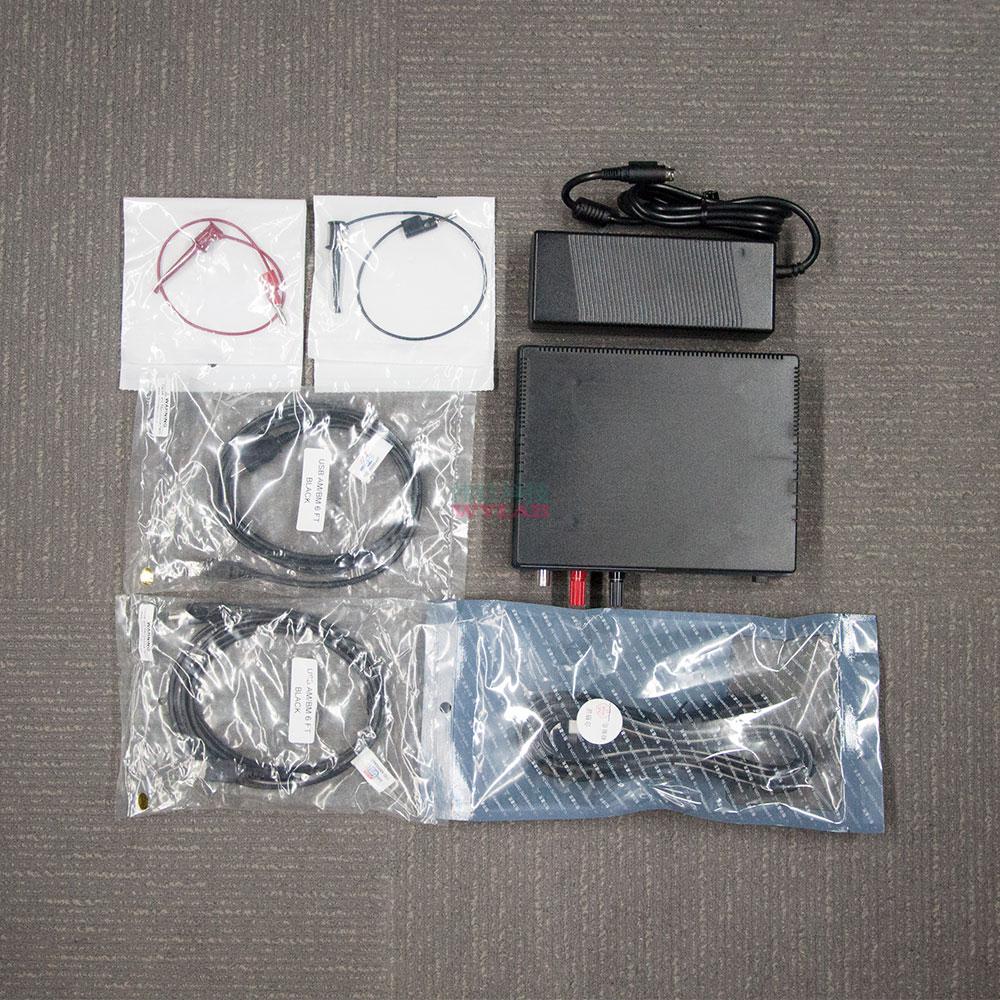
每个单元都配有一个定制设计的电源、2个鳄鱼夹、2条USB电缆和一个带有软件下载和支持文档链接的信息卡。
型号:AAA10F
联系人:陈先生(Mr. Aaron Chen )
手机:13076936897(微信同号)
电话:0755-2656 1139
地址: 深圳市宝安区甲岸西路尔体产业园A栋5楼5011


